Previous Topic: Review PrerequisitesNext Topic: DNS Redirection using the Update DNS Tool


Create and Run the Recovery Scenario

Review the prerequisites carefully before you launch the recovery. Use the Data Recovery wizard to restore data from the Replica.

Follow these steps:
  1. Log in to Arcserve RHA as an Administrator.
  2. From the Quick Start pane, click Scenario Management to open the Arcserve RHA Manager.
  3. Launch the Data Recovery Wizard from the Manager screen.
  4. Enter the credentials, when prompted.
  5. Select a recovery point on the Recovery Point Selection screen. For example, click Latest System Status and then click Next.

    The virtual machine shuts down.

  6. On the Master Root Directories screen, expand the source host and then, click or clear check boxes to include or exclude folders from the list. If you wish, you can apply a file filter. Click Next.

    Important: Do not select the C:\Windows folder as it can lead to certain conflicts later, especially if the operating system versions are different. If you do select the folder, then system registry files such as Sam, Security, Software, and Default are not restored.

    Note: We recommend skipping the RHA Engine folder (C:\Program Files\CA\Arcserve RHA\Engine) when you are not sure about the engine versions.
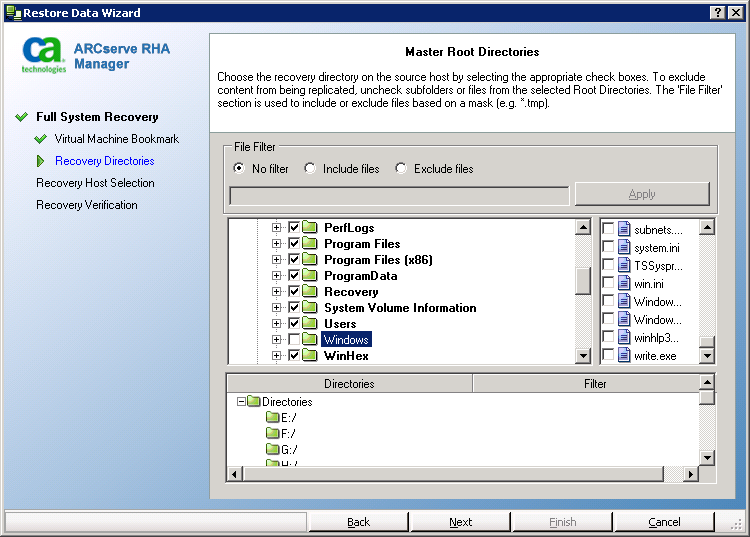
    master root directories

  7. On the Recovery Host screen, enter the required credentials and click Next.

    Wait while the verification completes.
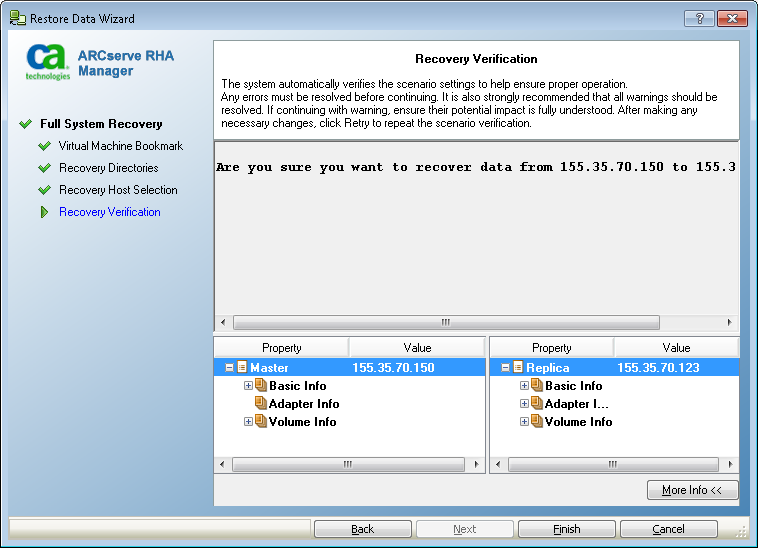
    recovery verification

  8. When the Recovery Verification screen opens, review the information or click More Info to see more details. Click Finish.

    A new scenario, Recovery_<Scenario Name>, is added to the list on the Manager screen. View the statistics for progress. The new scenario automatically stops once the selected data is recovered. The system reboots if necessary.