![Previous Topic: Backing Up and Recovering CA ARCserve Unified Data Protection Nodes from the [assign the value for rps for your book]](574.png)

Arcserve Backup lets you back up Arcserve Unified Data Protection (UDP) sessions that are protected under the RPS data stores to Arcserve Backup media through a proxy server. The Arcserve Backup media can be file systems devices, tape media, NAS devices, and devices that reside on a SAN.
When you back up CA ARCserve Unified Data Protection servers through an [assign the value for rps for your book] (RPS), Arcserve Backup retrieves all of the CA ARCserve Unified Data Protection backup sessions for all of the CA ARCserve Unified Data Protection servers that are protected by the [assign the value for rps for your book] data store.
This backup method lets Arcserve Backup synthesize full backup sessions from the full and incremental CA ARCserve Unified Data Protection backup sessions. The synthesized backup sessions can be used to recover CA ARCserve Unified Data Protection data at file level, folder level, and application level granularity, and to perform full system recoveries of the CA ARCserve Unified Data Protection servers, such as bare metal recovery.
The process of backing up an CA ARCserve Unified Data Protection server through an [assign the value for rps for your book] is almost identical to the steps that are required to back up files, folders, nodes, servers, and so on.
Backing up CA ARCserve Unified Data Protection nodes through an [assign the value for rps for your book] can also back up CA ARCserve Unified Data Protection nodes or CA ARCserve Unified Data Protection services that are down and not working.
Follow these steps:
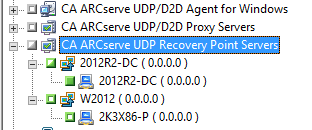
Specify the proxy servers containing the nodes that you want to back up as illustrated by the following screen:
Note: To back up the CA ARCserve Unified Data Protection sessions using multistreaming, on the Destination tab, click the Multistreaming option and then specify the maximum number of streams that you want to allow for the job.
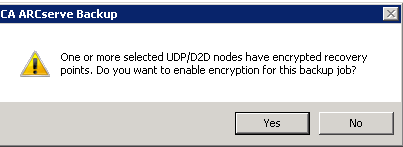
Note: If the CA ARCserve Unified Data Protection sessions is protected by CA ARCserve Unified Data Protection session password, then the following message appears to let you enable the Arcserve Backup encryption.
The Security and Agent Information dialog opens.
Note: For more information about the Run Now option, see Job Queue Tab.
The job is submitted.
|
Copyright © 2014 Arcserve.
All rights reserved.
|
|