

Installing the BFC › Overview of Installing the BFC › Installing on an Existing CentOS System
Installing on an Existing CentOS System
Setup machines BIOS to meet management requirements
Verify the following in the BIOS for each server that will be used within the backbone (you do not need to do this for the BFC node):
- ac power recovery ON.
- backbone NIC set to PXE boot.
- Set the backbone NIC from the previous step to be first in the boot order.
- In the IPMI interface (usually post the BIOS but prior to boot) verify ipmi over lan = ON.
- If you are using servers with processors that support HyperThread capability (some manufacturers may refer to this as a Logical Processor), it is recommended that you disable the HyperThread feature in your servers’ BIOS parameters. This will help ensure that both Hypervisors (Xen and VMware ESX) display the correct number of cores. If HyperThread is enabled, Xen will report eight cores for a Quad-core machine where VMware ESX will report four cores.
Hardware Requirements Document
It is recommended to read the Hardware requirements document before installing the BFC to verify that you servers meet the minimum requirements and that you understand the required network topology. In addition, it is beneficial to read the BFC Control Node Requirements.
CentOS Install/Configure
On the server you will be installing the BFC onto, install a "standard" package configuration of CentOS 5.5 32bit.
- Before you begin, verify that there are interfaces configured for the backbone and external networks (doesn't matter what eth<x> they're on).
- Post install, verify that SELinux is disabled and then reboot the node if you had to make a change.
- view /etc/selinux/config
- file should contain the line:
SELINUX=disabled
- If the file does not contain this line:
- Put "SELINUX=disabled" in the /etc/selinux/config file without quotes.
- Run "setenforce 0" from the shell (without quotes) to disable it in the current session.
- On a standard CentOS install, the runlevel is set to 5. This may cause error messages in the logs when X is not installed. We recommend setting the runlevel to 3.
- Edit /etc/inittab
- Change id:5:initdefault: to id:3:initdefault:
- If there is no internet access to the control node, configure yum updates to point at a local install image (this allows the system to bring the node up to the requirements necessary to run the BFC Controller):
- Mount the ISO image for CentOS 5.5 32-bit DVD so the system can use it as a yum repository to bring the currently installed OS up to date with version 5.5.
- (for example, mkdir -p /mnt/CentOS/5.5)
- (for example, mount –r –o loop /tmp/CentOS5.5/centos_5.5.iso /mnt/CentOS/5.5)
- service yum-updatesd stop
- chkconfig yum-updatesd off
- rename /etc/yum.repos.d to something else like yum.repos.d.orig
- add the following to /etc/yum.conf (verify there are no spaces before the text below when pasted into the file)
[iso]
name=iso
baseurl=file:///mnt/CentOS/5.5
- Verify the yum modifications work:
rpm -import /mnt/CentOS/5.5/RPM-GPG-KEY-CentOS-5
yum list (should list a pile of yum packages)
- Alternately, a proxy can be configured for the control node to get to the internet.
- Run the “date” command and assure that the system time is correct.
Get the BFC installer from download.3tera.net
- On a server that has internet access and you are logged into as the user who’s public SSH key you provided to CA for download access, run one of the following commands to copy over the BFC installer. It is preferred to use the rsync command to perform the copy operation as it can checksum the data too. If you’re on a machine with only SSH then you can use the scp command provided but make sure to compare the MD5 hashes provided in the packing.slip file post download to verify that the download completed successfully.
- (PREFERRED METHOD)
- cd to the directory where you want to download the BFC installer media.
- "rsync -rptgoLvc --delete -e 'ssh -i full_path_to_key' applogic@download.3tera.net:~/BFC/current ."
- (OPTIONAL METHOD)
- cd to the directory where you want to download the BFC installer media.
- "scp –r -i full_path_to_key applogic@download.3tera.net:~/BFC/current ."
- cd into the ‘current’ directory created in the above command.
- "md5sum -c packing.slip" which will verify each file automatically and show an OK status for each file.
Install BFC
- Log into the BFC control node as root using SSH.
- Copy the BFC installer ISO’s sync’d above to /tmp/BFC (Note: Do not copy the files to /opt/bfc as that is the default directory for the installation of the BFC and is removed and recreated during the installation process).
- Mount the BFC ISO.
mkdir -p /mnt/cdrom
mount -r -o loop /<path to bfcinstall.iso> /mnt/cdrom
(for example, mount -r -o loop /tmp/BFC/bfcinstall.iso /mnt/cdrom)
- Run the BFC installer.
/mnt/cdrom/fcinstall.sh -x /<path to bfcext.iso>
(for example, /mnt/cdrom/fcinstall.sh -x /tmp/BFC/bfcext.iso)
- Indicate if you want to attempt a recovery of the BFC from a database replica.
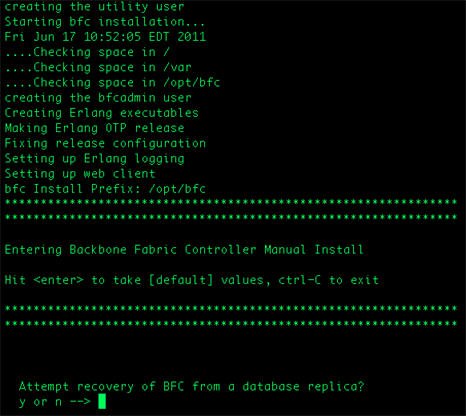
Database replication enables you to specify a location (preferably on a network storage device or on a network-mounted volume) where the BFC database will be replicated. If you need to restore a BFC (due to a hardware failure, disaster, or anything else), you simply run the installation program on the new BFC machine and specify the directory location of the replicated database. The new BFC will then be installed with the replicated database. Once the new BFC is installed, it will become aware of the existing grids and be able to control them as before.
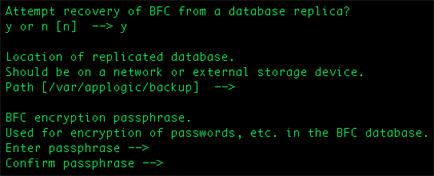
If you select Y, specify the values for the following parameters:
- Location of replicated database
-
Location (preferably on a network storage device or on a network-mounted volume) where the BFC database will be replicated.
- BFC encryption passphrase
-
The passphrase to use for encryption of the replicated database.
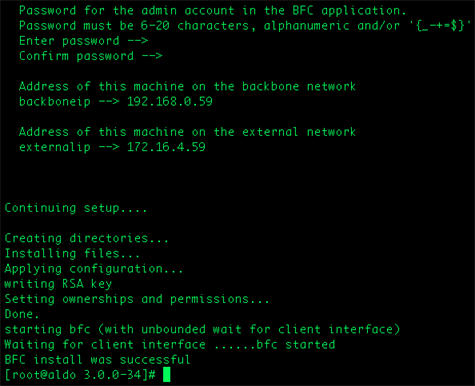
- Indicate the IP address of this machine on the backbone network. The machine must have an active interface configured at this address. You must have only one backbone network before you can create your grids. Typically, the address of the backbone network is 192.168.0.0/24.
- Indicate the IP address of this machine on the external network. The machine must have an active interface configured at this address. You must have at least one external network before you can create your grids.
- The "BFC install was successful" message appears when the installation completes.
Copyright © 2011 CA.
All rights reserved.
|
|