

As a system administrator, you can configure the web director to direct login requests to a specific web engine using the Secure Socket Layer (SSL) protocol. Configuring the SSL authentication provides enhanced login security while allowing users to access a higher performance connection.
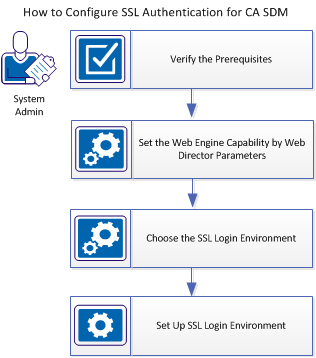
Verify the following prerequisites before you begin the SSL configuration:
After you configure the web engine to use a web director, the web engine can handle the web client requests. The web engine can service login requests (redirect nonlogins elsewhere) or nonlogin requests (redirect logins elsewhere) or both (‘general purpose’ web engine). The WebDirector parameter found in the <Host_Name>-web[#].cfg file determines how webengine can service login requests.
The following table shows the relationship between the web engine role and web director parameter setting:
|
Web Engine Capability |
‘<Host_Name>-web[#].cfg’ ‘webdirector’ Parameter Settings |
|---|---|
|
Service login requests |
‘UseDirector AfterLogin’; ‘Willingness 0’ |
|
Service non-login activity |
‘UseDirector BeforeLogin’; ‘Willingness [1 thru 10]’ |
|
General purpose |
‘UseDirector Yes’; Willingness [1-10]’ |
You can use the web director for a targeted SSL login in a mixed SSL/non-SSL web environment to redirect every web-login request to the specific SSL web engines. All other requests can be redirected to and serviced by the non-SSL web engines.
Choose from the following SSL Login environment:
You can use web director in a non-SSL environment with basic load-balancing. Web director balances load across all web engines according to each web engine willingness value. Each web engine can service login requests and nonlogin requests. The HTTP protocol is used for communication between the web client and the web server.
For each web engine under web director control, set the web director parameters in the web engine ‘<Host_Name>-web[#].cfg’ as follows:
You can use web director in a global SSL environment with basic load-balancing. Web director balances load across all web engines according to each web engine willingness value. Each web engine can service login and nonlogin requests. The HTTPS protocol must be used for all communications between web clients and the web server.
For each web engine under web director control, set the web director parameters in the web engine ‘<Host_Name>-web[#].cfg’ as follows:
You can use web director for a targeted login in a non-SSL environment with optional load-balancing. The login-only web engine services only the login requests. The remaining web engines under web director control, service all other requests. This configuration puts the entire burden of servicing login requests on the specified login-only web engines. The HTTP protocol is used for communications between the web client and the web server.
For the login-only web engines, set the web director parameters in the web engine ‘<Host_Name>-web[#].cfg’ as follows:
For the nonlogin web engines, set the web director parameters in the web engine ‘<Host_Name>-web[#].cfg’ as follows:
You can use web director for a targeted SSL login in a mixed SSL/non-SSL web environment with optional load-balancing. Every web-login request is redirected and serviced by the SSL web engines, while other requests being serviced by the non-SSL web engines. The HTTPS protocol must be used for all communications between the web client and the SSL web engines.
Setting up SSL allows web transactions to be encrypted, providing maximum security for sensitive data, especially passwords. Depending on your configuration type, you can implement an SSL login environment on the configured CA SDM servers.
Follow these steps:
‘$NX_ROOT/bopcfg/www/wwwrootsec’
‘$NX_ROOT/bopcfg/www/wwwrootsec’
Note: In this example, CAisdsec is user-defined and can be renamed.
Note: Webdirectors do not use a ‘<Host_Name>-web[#].cfg’ file. However, web engines require a unique ‘<Host_Name>-web[#].cfg’ file. Sample web.cfg files are automatically generated while running the configuration. You can import the customizations in the original web.cfg to the new web configuration files by specifying the original web.cfg as the template file you want to use.
For the secondary server configuration, Move all $NX_ROOT/samples/pdmconf/’secondary_server_name-web[#].cfg’ from the primary server to the secondary server $NX_ROOT/bopcfg/www directory
For the HTTP server like IIS or Apache, create copies of ‘pdmweb.exe’ in the $NX_ROOT/bopcfg/www/wwwroot directory, a ‘pdmweb[#].exe’ for each web engine, and a ‘pdmweb_d[#].exe’ for each webdirector that has been configured. Verify that the ‘pdmweb[#].exe’ and ‘pdmweb_d[#].exe’ are named according to the correct CGI I/F values (for example: ‘pdmweb1.exe’, ‘pdmweb2.exe’, pdmweb_d1.exe’, and so on).
To implement the SSL login you have set up, make changes to the web director parameter values.
Follow these steps:
After the configuration, restart Service Desk. After the service restarts, test the login by accessing the non-ssl web engine using HTTP. Verify if it automatically redirects you to the HTTPS secure webengine for the login. Once you are logged in, it automatically redirects you back to the non-ssl HTTP webengine for the normal Service Desk activity.
You can verify the SSL login environment for web engines.
Follow these steps:
For secure-login web engines, create instances of pdmweb.exe in the $NX_ROOT/bopcfg/www/ wwwrootsec directory with the name of pdmweb[#].exe. The executable name must match the CGI I/F value for each secure-login web engine.
Example: If you have assigned the CGI I/F value of the secure-login web engine to pdmweb2, create a physical copy of pdmweb.exe, and rename it pdmweb2.exe.
For non-secure web engines and web directors, create instances of pdmweb.exe in the $NX_ROOT/bopcfg/www/wwwroot directory. A copy of pdmweb.exe must exist for each non-secure web engine and webdirector configured. Rename the copies so that the new names of the executables match the CGI I/F values that have been defined for the web engines and web directors.
Example: If you have assigned the CGI I/F value of pdmweb3 to the non-secure web engine and the value of pdmweb_d1 to the web director, then create two copies of pdmweb.exe. Rename the first copy to pdmweb3.exe, and then rename the second copy to pdmweb_d1.exe.
Configure SSL on Tomcat Servers in your CA SDM environment.
Follow these steps:
Note: A keystore is a store or storage unit for certificates, in which the certificates are imported to, and then Tomcat points to use that keystore and certificates for SSL.
A keystore.jks file is created in the C:\certificates\ directory.
A .csr file is created in the c:/certificates directory on each server where you generated the certificate request.
Note: The certificate you receive from each is different. Some vendors will send you multiple certificated possibly including a root certificate, an intermediate certificate, and a certificate of authority. Each vendor has different instructions on which certificates they provide need to be imported into the keystore. So the key here is to ask the specific vendor that you used to generate the certificates for you, for specific instructions on how to import their certificates into a tomcat keystore.
Once you received the specific instructions from the vendor, you can follow those to import the appropriate certificates into the keystore on each server. Once that is complete, you can now configure Tomcat on the Service Desk side of things to point it to that keystore where the certificates have been imported.
<-- <Connector port="8443" maxHttpHeaderSize="8192"
maxThreads="150" minSpareThreads="25" maxSpareThreads="75"
enableLookups="false" disableUploadTimeout="true"
acceptCount="100" scheme="https" secure="true"
clientAuth="false" sslProtocol="TLS"
keystoreFile="keystoreFile="C:\Documents and Settings\user\.keystore"
keystorePass="password"/> -->
<Connector port="8443" maxHttpHeaderSize="8192"
maxThreads="150" minSpareThreads="25" maxSpareThreads="75"
enableLookups="false" disableUploadTimeout="true"
acceptCount="100" scheme="https" secure="true"
clientAuth="false" sslProtocol="TLS"
keystoreFile="keystoreFile="C:\certs\keystore.jks"
keystorePass="password"/>
Note: Be sure to remove the <-- and --> tags that currently comment out the HTTPS/SSL connector for Tomcat, and set the appropriate path and password for your keystore that you generated in the beginning.
pdm_tomcat_nxd -c stop
pdm_tomcat_nxd -c start
Note: We recommend you to restart all the CA SDM servers to ensure that the Tomcat is restarted.
https://servername:8080/CAisd/pdmweb.exe
The Service Desk Login Screen should open. You have successfully configured SSL on Tomcat.
|
Copyright © 2013 CA.
All rights reserved.
|
|