Create Organization Tree Branches

Use this procedure to create branches in your Organization Tree. Later you will assign machines to these branches. The Organization Tree branches enable you to manage groups of machines simultaneously.

Recommendation: The layout of your Organization Tree can policy creation and management efficient.

To create Organization branches

  1. Go to Start, Programs, CA, eTrust, eTrust ITM, Console.
  2. Log in using domain\user_name format:

    Log In Using Domain Name

  3. Click on the Organization tab.
  4. Select the Organization folder, and then click Add.
  5. In the New Branch dialog, enter a name for this branch and click OK.

    Use a descriptive name that you can identify later. For example, you might create branches for specific subnets in your office, different office locations by city, functional departments such as Development and Marketing, server machines verses client machines, and so on.

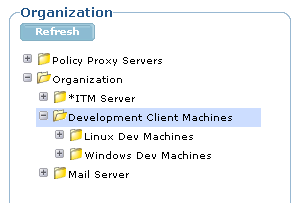
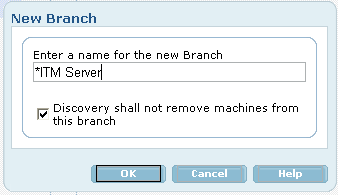
    Note that you can force a branch to the top of the Organization Tree by placing an * at the beginning of the name.

    Recommendation: Ensure that the "sticky branch" option (Discovery shall not remove machines from this branch) is used only when machines should never be allowed to move to a different branch of the Organization Tree.

    Add an Organization Tree Branch

  6. Repeat this procedure to add more branches.

    The following screen-shot shows an Organization Tree with the TM Server at the root level of the tree, multiple branches, and branches that contain sub-branches.

    Organization Tree with Branches

More information:

Designing an Organization Tree


Copyright © 2009 CA. All rights reserved.