

|
|
|
The Database Information dialogs define a database user and the database for the CA XCOM Interface Server to store status information. The database can be DB2 or MySQL.
For MySQL, the installer can be requested to either create a new database or use an existing one. However, for DB2, the installer is unable to create databases and so the database must be predefined using DB2 administration tools.
A database user account is required by the CA XCOM Interface Server to enable it to access and update its database tables. This account needs read and update privileges for all tables in the designated database, but does not need any structure or administration privileges or any access privileges for any other database.
The installer also requests user ID and password credentials for an admin user database account. These will be used only during product installation, to create tables within the database. The admin user account needs to have table create and drop structure privileges for the designated database, to enable it to create tables. For MySQL only, the admin user account also needs database creation privilege, if the installer is to be requested to create a new database.
The database table names used by CA XCOM Data Transport are unique to each product. Consequently, you can share the same database between CA XCOM Interface Server, CA XCOM Gateway, and CA XCOM Management Center, or you can use separate databases for each component.
Depending on whether you use a DB2 or MySQL database, the procedure differs.
To define the DB2 user and database
The dialog displays the DB2 information fields:
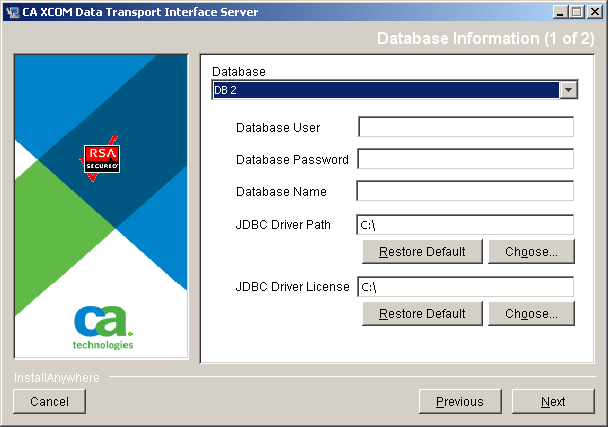
If a suitable user does not exist, you can use your operating system tools to create a user account for connection and access to the database tables.
The second Database Information dialog opens:

The port number is set initially to the default value of 50000 for DB2.
During installation, the installer connects to the database server as this user to create the required database tables.
The installer connects to the specified database server to verify the validity of the specified information. The Application Server Information dialog opens.
Note: Tables are not created at this stage. They are created later after you review your installation choices and request the installation to proceed.
To define the MySQL user and database
The dialog displays the MySQL information fields:
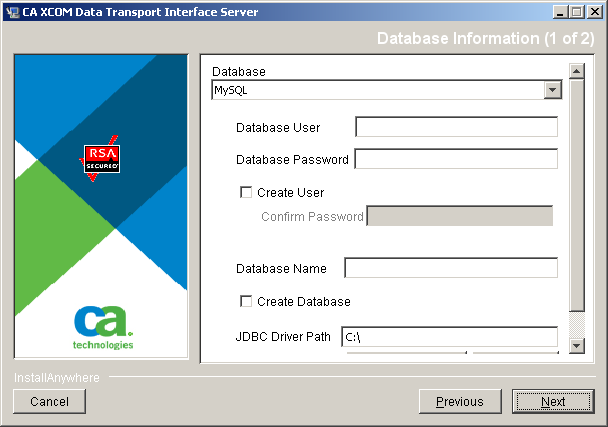
You can specify an existing user and database, or you can ask the installer to create the user and database.
The indicated user account will be used by the CA XCOM Interface Server, on an ongoing basis, to access and update database tables. Therefore, if you specify an existing user, this user account must have all data privileges (that is, select, insert, update, and delete) at either database or global level, but does not require structure or administrative privileges.
Notes:
Note: The installer will create the database user only if both of the following apply:
The second Database Information dialog opens:
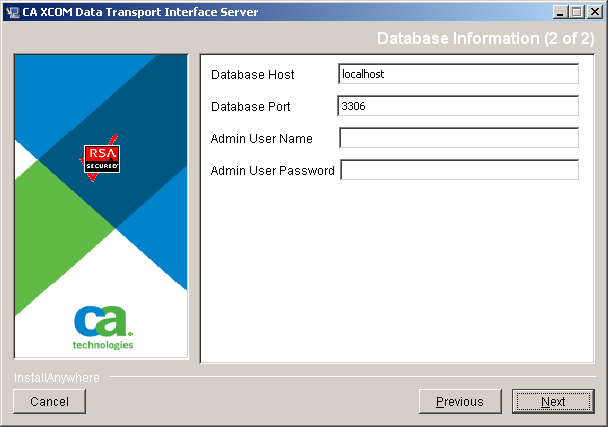
The port number is set initially to the default value of 3306, the standard MySQL server port number.
Notes:
The installer connects to the specified database server to verify the validity of the specified information. The Application Server Information dialog opens.
Note: Tables are not created at this stage. They are created later after you review your installation choices and request the installation to proceed.
| Copyright © 2011 CA. All rights reserved. | Tell Technical Publications how we can improve this information |