

|
|
|
You can install a downloaded product through the Software Catalog, Base Install Packages section. The process starts a wizard that guides you through the installation. At the end of the wizard, a task dynamically invokes the SMP/E and other utilities required to install the product.
Note: If your site uses only one file system (for example, only zFS or only HFS), you can configure CA MSM to use this file system for all installed products regardless of the file system that the product metadata specifies. The settings are available on the System Settings, Software Installation page. The file system type that you specify will override the file system type that the product uses.
To install a product
Information about the product appears in the Base Install Packages section at the right, for example:
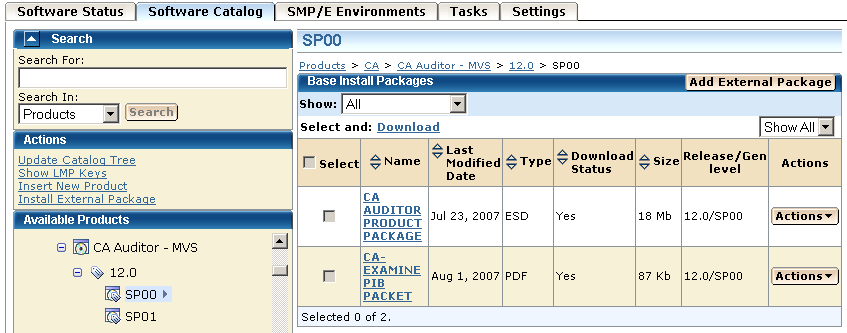
Note: If a product is acquired external to CA MSM, you can install the product using the Install External Package link. The process starts the wizard.
or
The Introduction tab of the wizard appears.
Note: An information text area can appear at the bottom of the wizard. The area provides information that helps you progress through the wizard. For example, if a field is highlighted (indicating an error), the information text area identifies the error.
You are prompted to select the type of installation.
(Optional) If you select Custom Installation, you are prompted to select the features to install. Select the features, and click Next.
A summary of the features to install is displayed, with any prerequisites.
You are prompted for the CSI to use for this installation.
You are prompted to locate the installed prerequisites. If an installed prerequisite is in more than one CSI or zone, the CSI and Zone drop-down lists let you select the specific instance. After you make the selections, click Next.
You are prompted for the CSI to use for this installation.
Note: You can use the Custom installation to select only those features that have the required prerequisites. You can click Back to return to previous dialogs.
If you select Create a New SMP/E CSI, you are prompted to specify the CSI parameters.
Note: Only CSIs for the SMP/E environments in your working set are listed. (You can configure your working set from the SMP/E Environments tab.) If you select a CSI about which CA MSM has incomplete information, the wizard prompts you with extra parameters.
After a CSI is selected or a new CSI is specified, you are prompted for the target zone to use.
Note: If you select Create a New SMP/E Target Zone, you perform additional steps similar to the steps for the Create a New SMP/E CSI option.
After a target zone is selected or specified, you are prompted for the distribution zone to use.
After a distribution zone is selected or specified, a summary of the installation task appears.
A dialog opens that shows the progress of the task. When the task completes, you can click Show Results on the Progress tab to close this dialog and open the task output browser to view the details of the actions. Click Close to close the task output browser.
Note: While a task is in progress, you can perform other work. You can click Hide to exit the dialog and view the task status later on the Tasks tab.
Important! After you install the product, you still need to implement and deploy the product.
| Copyright © 2010 CA. All rights reserved. | Tell Technical Publications how we can improve this information |