

|
|
|
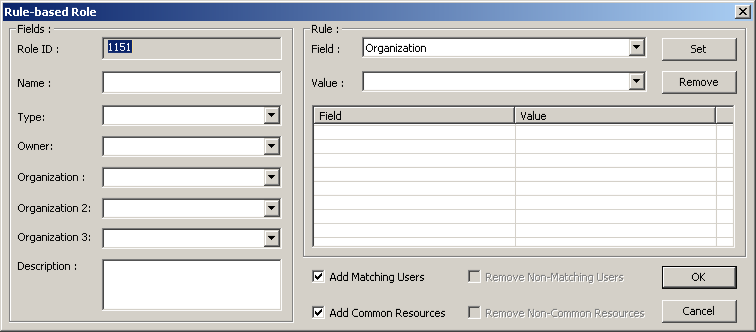
Rule-Based roles employ a set of organizational, functional and hierarchical based characteristics to define a rule that is then used to automatically assign users with matching characteristics to the role. Using a rule-based role you can scan the entire configuration and identify all users that conform to the role in one single action. Rules-based roles are constructed and added to the configuration through the Rule-Based Role window.
Rules are made up of a series of Field and Value pairs, selected and then set in the Rule group box in the right side of the Rule-base Role window.
To create a rule -based role
The Rule-based Role window appears. The Role ID is provided by DNA and is automatically incremented by a value of 1 from the ID given to the previously created role.
The Field and Value pair are placed in the Rule list.
The check box is selected by default.
The role is added to the configuration file and is listed at the bottom of the configuration file's Role Panel.
| Copyright © 2010 CA. All rights reserved. | Email CA Technologies about this topic |