CA Plex creates standard OS/400 programs that you can call from any System i menu system. OBASE provides its own menu system that you will use to create a top-level menu.
- This is the first time you will create an inheritance triple to inherit from a function. Change the Object Browser to display functions.
- In the Model Editor, change the object type to function, and add the following triple:
Project Manager is a OBASE/Default Objects.MDI Template
Note: To get to Default Objects.MDI Template in the Object Browser, display entities, make sure library objects are showing, and expand OBASE/Default Objects.
This defines the unscoped function, Project Manager. Remember, to view unscoped functions in the Object Browser, you must change the Object Browser to view functions. Until now, you have only worked with scoped functions, which you viewed with the Object Browser set to show entities.
- Expand the Project Manager function to show the objects it scopes.
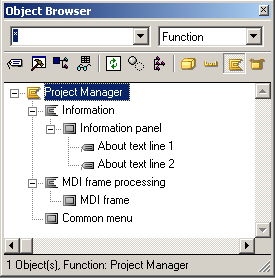
Project Manager has two functions scoped to it:
- Information that displays information about the application, and MDI Frame Processing, which displays the top‑level menu
- It also scopes a panel called Common Menu, which is used primarily with non-5250 applications
Next, you modify the top-level menu to add menu items to it.
- Open Project Manager.MDI Frame Processing.MDI Frame.
- In the Panel Palette, select the Selector text region.
- In the Design Window, move the Selector text region to the center of the panel.
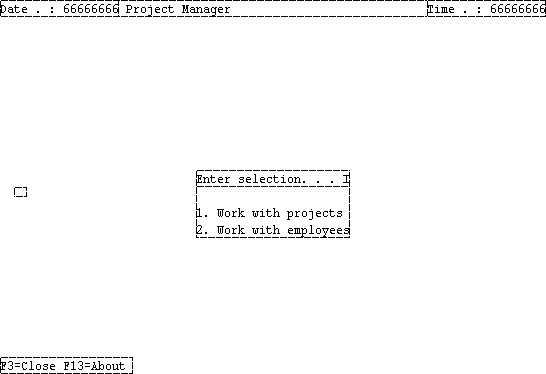
- Add the following static text items to the Selector text region. For more information, see Adding Static Text in the chapter "Modifying the User Interface."
1. Work with projects
2. Work with employees
- Rearrange the static texts to make them visible:
- Add the following logical events to the panel. For more information, see To Add a Logical Event to the Edit Project Panel in the chapter "Defining Owned By Relationships."
Work with projects
Work with employees
- Add the grid selector values 1 and 2 to the panel, and associate them with the corresponding logical events. For more information, see Creating a Subfile Option in the chapter "Defining Owned By Relationships."
Instead of adding them under the Grid region’s menu selector field, you add them under the Selector text region’s menu selector field.
- Close the panel and save your changes.
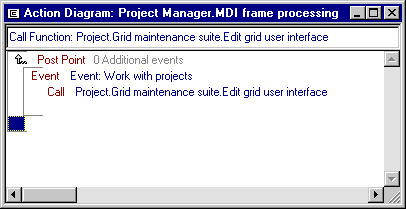
- Edit the function Project Manager.MDI Frame Processing so that the application calls the function Project.Grid Maintenance Suite.Edit Grid User Interface when the Work with projects logical event is triggered. For more information, see Adding Functionality to Logical Events in the chapter "Defining Owned By Relationships."
Choose the post point that follows the 0 Additional Events edit point.
- Click in the Action Diagrammer under the construct you just created. The Action Diagrammer should look like this:
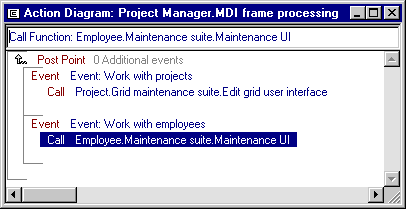
- Add another instruction to the function so that it calls the function Employee.Maintenance Suite.Maintenance UI when the Work with employees logical event is triggered.
When your action diagram is finished, it should look like this:
- Close the function and save your changes.

