

|
|
|
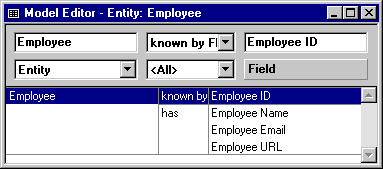
The next step in defining the Employee entity is to add triples for Employee to inherit a user interface from class library entities.
Employee is a OBASE/User Maintained Entity
This inheritance triple provides Employee with user interface functionality from User Maintained Entity in the OBASE class library.

Notice that Employee inherited the function Maintenance Suite, which has the functions Change User Interface, Create User Interface, Delete User Interface, and Maintenance UI scoped to it, each of which scopes a panel object. These four functions display panels on which end users can add, change, and delete Employee data. You will see how the functions interact when you generate and build the Employee entity at the end of this chapter. (You will not use the two print functions in this tutorial.)
Employee is a OBASE/Referenced Entity
This gives Employee functionality that enables end users to select from a list of employees to assign to a task. This is covered in more detail in the following section.
The inheritance triples you created in the previous steps gave the Employee entity the following:
| Copyright © 2012 CA. All rights reserved. | Tell Technical Publications how we can improve this information |