

|
|
|
At this point, the buttons you just created will not do anything if you click them. You need to define a logical event for each button so that you can define what should happen when that button is clicked.
Use logical events to link actions end users take to code in an action diagram. In the following steps, you create logical events that are triggered when your end users click each of the three buttons.
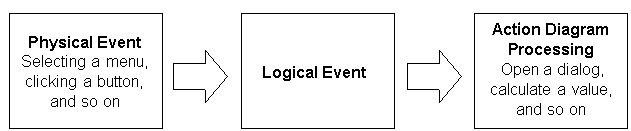
After you define these events, you modify the Project Manager function to call the wizard and property sheet functions when each logical event is triggered.
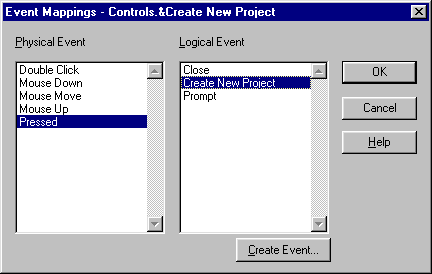
To create logical events on a panel:
The Event Mappings dialog appears.
Note that there are already two logical events defined: Close and Prompt. Next, you add your own logical event.
The Create Event dialog appears:
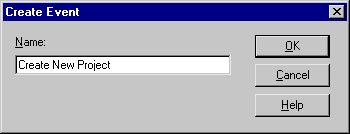
Now, when end users click the Create New Project button, the Create New Project logical event is triggered. Later, you add action diagram code to call the Project Wizard function when this event is triggered.
| Copyright © 2012 CA. All rights reserved. | Tell Technical Publications how we can improve this information |