Creating a Property Sheet › Testing Your Property Sheet
Testing Your Property Sheet
You now have a fully functional property sheet. You:
- Added restrictor processing so that when you select a project from the Projects and Tasks tab, only the tasks that belong to the selected project appear
- Changed the tab text and the dialog caption
To test your property sheet:
- In the Generate and Build window, select the Project Property Sheet function and click the Run button.

- Select Plex r7.0 Tutorial.dsn from the Select Data Source dialog.
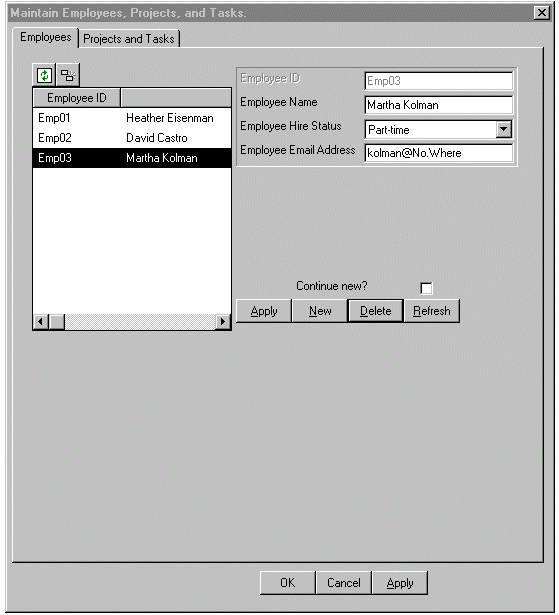
The Maintain Employees, Projects, and Tasks property sheet appears.
There are two Apply buttons:
- One on the Employee tab—Detail region applies a new or changed employee record
- One at the bottom of the property sheet—Processes all of the action diagram code that clicking the OK button processes, but does not close the property sheet
- Select the Projects and Tasks tab:
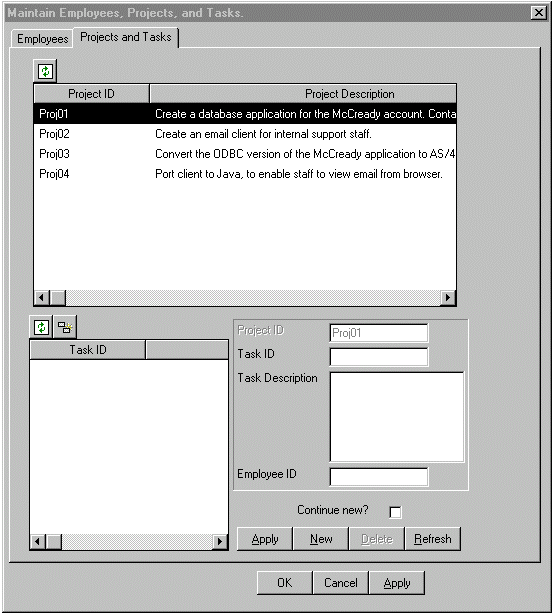
- Select Proj04 from the grid at the top.
- Notice that the task you created for Proj04 appears in the bottom portion of the property sheet.
- Select Proj02 from the grid at the top.
- Note that the Project ID field in the task detail region fills in.
- Add the following task information:
|
Value
|
Enter
|
|
Task ID
|
Task01
|
|
Task Description
|
Design the server functionality
|
|
Employee ID
|
Emp03
|
- Click the Apply button in the Detail region.
- Click OK to close the dialog.

