Using the Motif Interface › Load Balance Groups › Setting or Editing a Load Balance Group for a Job
Setting or Editing a Load Balance Group for a Job
To assign a Load Balance Group to a job or change the Load Balance Group assigned to a job with the Motif Interface, follow these steps:
- Double click on the job’s icon in the Graphical or Linear Display.You can also select the job by clicking the job and then select Edit… from the jobs menu.
- Click the Auxiliary Options… button. The Job Management Manager Job 10 Edit (Auxiliary) dialog appears.
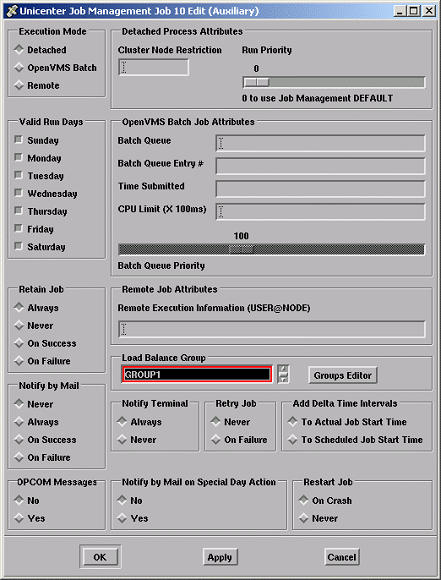
- Use the arrows to locate the Load Balance Group.
Note: If you need to create a new group, you can click the Groups Editor button.
- Click the name of the Load Balance Group you want to assign the job to. To remove a Load Balance Group assignment, select <None>.
- Click Apply. Your selection is saved. You can also click OK to save your selection and exit the Job Management Manager Job 10 Edit (Auxiliary) dialog.

