Upgrade Guide › WebLogic Version › Provisioning Components Upgrade › Upgrade the Provisioning Directory
Upgrade the Provisioning Directory
For the provisioning components to work with CA Identity Manager, upgrade the Provisioning Directory schema and CA Directory.
Note: If you want to install your Provisioning Directory on a new system, migrate the Provisioning Directory instead of performing an upgrade.
When upgrading CA Directory, the installer may ask you perform one of these actions:
- Close cmd.exe
- Stop CA Identity Manager
If you encounter either message, click Ignore and continue with the upgrade.
To upgrade the Provisioning Directory
- If you have primary and alternate Provisioning Directories, back up your primary Provisioning Directory.
- Shut down all Provisioning Directories in your environment.
- If you are upgrading from a release prior to CA Identity Manager r12.5, complete the following steps
Note: If you are upgrading from CA Identity Manager r12.5 or a higher release, skip to step 4.
Starting at CA Identity Manager r12.5, CA Directory no longer uses Ingres as a data store. Instead, a new memory-mapped file technology named DXgrid is used. Therefore, you perform these Ingres steps:
- Stop Ingres with the following command:
ingstop -service

- If you get an error, use this command:
ingstop -kill
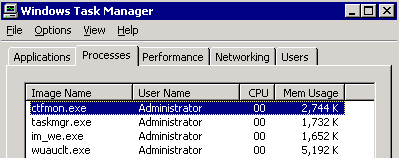
- Verify that all of the following Ingres processes are stopped (use the Window Task Manager or the UNIX ps command):
- dmfacp.exe
- dmfrcp.exe
- iidbms.exe
- iigcc.exe
- iigcn.exe
- iijdbc.exe
- iistar.exe

- Restart Ingres with the following command:
ingstart -service
- Issue the following dxserver command:
dxserver start all
- Stop the Connector Server and Provisioning Server services.

- Choose the upgrade method for the provisioning directory:
- If you are upgrading from an r12.5 or r12.5 SP release, you can upgrade using the installer, which starts the upgrade wizard.
- If you are upgrading from an r12 release, use upgrade.bat (or upgrade.sh) in the CADirectory/dxserver directory, not the Provisioning Directory setup.exe file. The upgrade.bat script examines your system, performs any prerequisite cleanup, upgrades CA Directory and then upgrades the Provisioning Directory.
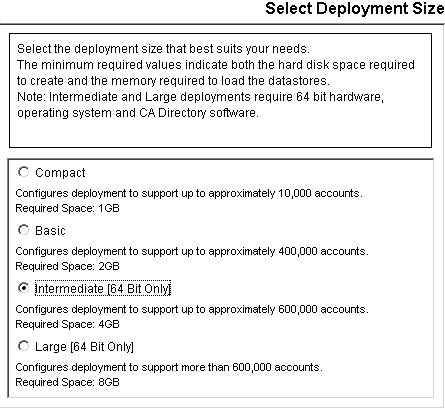
- Answer the question about deployment size if the Select Deployment Size screen appears in your upgrade. Consider the following guidelines, while allowing room for future growth:
- Compact—up to 10,000 accounts
- Basic—up to 400,000 accounts
- Intermediate (64 bit only)—up to 600,000 accounts
- Large (64 bit only)—more than 600,000 accounts
Note: If you are installing a Provisioning Directory in an established CA Identity Manager installation, be sure to make the deployment size large enough. Otherwise, an error occurs because the data does not fit when loaded into the data files. Intermediate and Large installations require 64-bit Directory installs (either Solaris or Windows 64 bit).

- If you are installing the Provisioning Directory in an FIPS 140-2 enabled environment, select the FIPS 140-2 Compliance mode check box during installation and provide the FIPS Key File.
- If you are upgrading a pre-r12.5 installation, a CA Directory Upgrade Configuration appears:

- Click Finish to perform the CA Directory upgrade. Note the following:
- The CA Directory starts by backing up your current installation when you click Migrate.
- Select a Typical installation type when prompted during the CA Directory upgrade.
- Due to architectural changes effective in CA Directory r12 SP1 and higher, reporting databases and unnecessary DSAs are removed before the CA Directory upgrade.
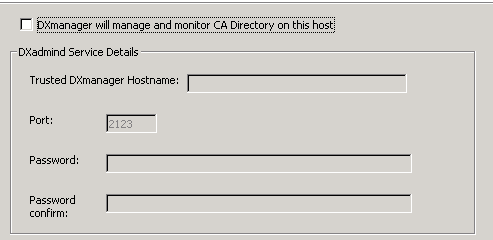
- During CA Directory installation, you are asked for information about installing DXadmind for DXManager, however, you can safely uncheck this option. The Provisioning Directory does not use DXManager.

Once the CA Directory upgrade completes, the Provisioning Directory upgrade resumes.
- Go through the wizard and enter the information you collected for the upgrade.
During upgrade, you can select a check box to configure Provisioning Directory high availability. If you choose this option, you supply the hostnames of all alternate Provisioning Directories and specify the primary Provisioning Directory.
- When the upgrade completes, uninstall and reinstall any alternate Provisioning Directories. For more information, see the Installation Guide.
After the upgrade completes, you can find CA Directory documentation in the following locations:
- Windows: Go to Start, Programs, CA, Directory, Documentation.
- UNIX: Navigate to /opt/CA/Directory/doc.


