

|
|
|
You can now apply the features of the Database Object Manager to work. In this example, we create and modify a non-SQL subschema based on an existing subschema definition. To do this, we use the following:
First, open CA IDMS Visual DBA and connect to a CA IDMS data source that contains the Commonwealth demo database supplied with the CA IDMS installation. Make sure that your profile includes viewing and updating the Commonwealth demo database. In this example we assume that you are granted update access to the Dictionary object. After logging on, drill down the Dictionary branch to the subschema object by double-clicking the object or simply clicking the + icon that prefixes the object and instance, as follows:
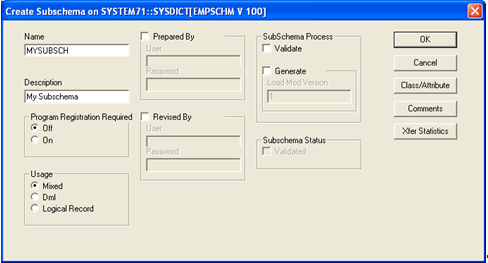
Next, right click the Subschema object and select Create. In the Create Subschema dialog, enter a name for your subschema, such as MYSUBSCH and then click OK:
The Database Object Manager is refreshed and the name of the subschema you just created is displayed.
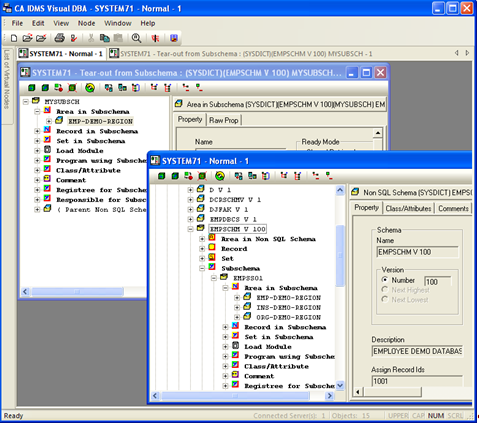
You can now populate  the new subschema with information copied from an existing subschema. To make it easier to view, first 'tear-out' the subschema you created and display it in a new window. To do this, select the subschema, MYSUBSCH, and click Tear Out from the Window menu. A new window appears with your subschema at the root level. Next, click Tile Vertical button
  to display both windows side-by-side.
In the original window, double-click the EMPSS01 subschema and then double-click Area in Subschema. We are going to copy the EMP-DEMO-REGION area to the subschema you just created. In the 'Tear-Out' window, double-click MYSUBSCH to display the subschema objects.
To copy the EMP-DEMO-REGION area to the new subschema, drag-and-drop EMP-DEMO-REGION from the original window to the Area in Subschema object of the 'Tear-Out' window.
Note: The mouse cursor changes to the Area icon when it is positioned over Areas in Subschema.
If you successfully copied the EMP-DEMO-REGION area, your window should look something like this:
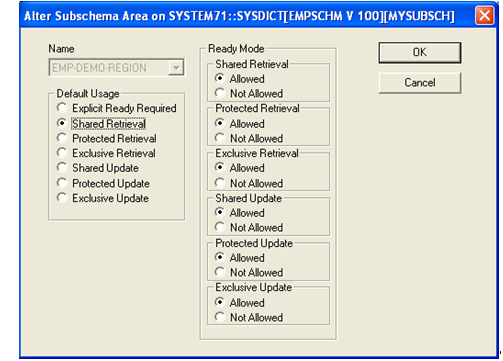
Finally, you can modify the default usage of the EMP-DEMO-REGION area in the new subschema. To do this, select it and right-click. From the pop-up menu, click Alter. Click Shared Retrieval under Default Usage and then click OK:
You have just completed a brief tour of the Database Object Manager. You have seen how easily you can use simply point-and-click techniques to create, copy, and modify database objects.
| Copyright © 2011 CA. All rights reserved. | Tell Technical Publications how we can improve this information |