The model is not fully converted or updated until you initialize the mart and initially open and save the model in the mart with CA ERwin Data Modeler.
Note: When you first open the model, it can take a few minutes longer to complete the process.
To convert a mart
Notes:
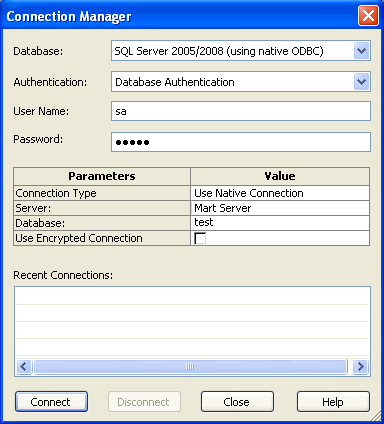
The Connection Manager dialog opens.

Identifies the type of relational database management system (DBMS) to which you are connecting. Select from the current list of supported databases.
Specifies the use of Windows user names and passwords to secure database access.
Specifies the use of a local user name and password for the connection.
Specifies the use of Native Connection to connect using the SQL Server Native client software or ODBC data to connect using the ODBC data source you have defined.
Identifies the server name.
Identifies the name of the database or mart.
Specifies the connection string (TNSNames entry).
You can select a database connection from the Recent Connections panel to populate the Database or Connection String previously used automatically.
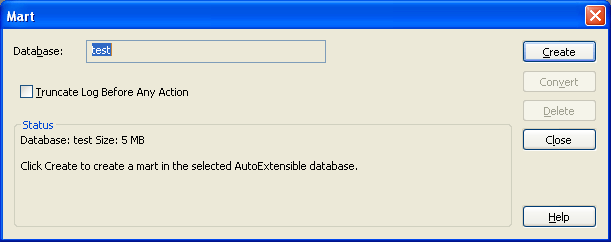
The Mart dialog opens.

Identifies the master database name to create the tables and stored procedures.
Identifies the Oracle MMUSER security role. This role is created in the procedure for creating the mart database on Oracle. Other user roles can connect to the mart, but they will encounter access problems.
Indicates where you want to store the mart tables.
Note: The drop-down box is not active if there is only one tablespace.
Indicates where you want to store the mart indexes.
Note: You can store tables and indexes in the same tablespace or in different tablespaces.
Specifies to remove the database transaction log. Truncating the database transaction log is especially important for Microsoft SQL Server and Sybase users since a large transaction log can cause the database to hang.
Note: When you initialize a Microsoft SQL Server 2008 database, it is not necessary to select the "Truncate Log Before Any Action" option. If you select this check box, and click Create, the following error message displays: "Incorrect syntax near the keyword 'TRANSACTION'." To avoid this message, clear the check box for "Truncate Log Before Any Action" before you click Create.
Creates an empty mart. You can manually open and save existing CA ERwin Data Modeler models to this new mart.
Creates a new mart with the current version and updates the data from the old mart to the new mart. The Update button is enabled only when an earlier version of the software is detected. When you update your mart, the old mart is no longer usable in the previous version.
Note: The Create and Update buttons are mutually exclusive and the text of the button changes depending if a previous version of the mart is detected. If the Create button is not enabled, then a previous version of a mart is detected.
Creates a new mart with the current version and copies the data from the old mart to the new mart. The old mart is retained in the same database.
The dialog displays conversion progress messages.
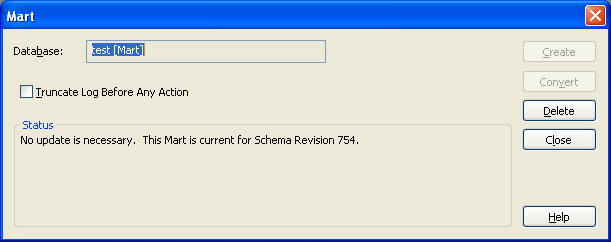
The Mart dialog displays the status.

The administrative setup is complete.
The conversion is complete.
The same user profile assignments exist as before the conversion. If you must make changes to user profiles, click Mart, Security Manager on the File menu to open Security Manager.
| Copyright © 2012 CA. All rights reserved. | Tell Technical Publications how we can improve this information |