Previous Topic: Peer-to-Peer Communication with Remote Computers

Next Topic: Activate Changes

Use CA NSM

To use CA NSM

  1. Open the EM Connection Manager on your remote CA NSM distributed computer and make the following selections:
    1. For Machine Name, choose the CAICCI SYSID as the name of the server.
    2. For Platform, choose IBM zOS.
    3. Check the Edit CAICCI Fields check box.
    4. Click Add New to add the server to the list.

      This is the opening screen of the wizard to add additional machines to your administration configuration in the EM Connection Manager.

  2. Click Next to update the CAICCI fields to conform to the mainframe settings.
  3. Ensure that the value specified for the CAICCI Port # matches what is being used by the CCISSLGW started task on the mainframe.

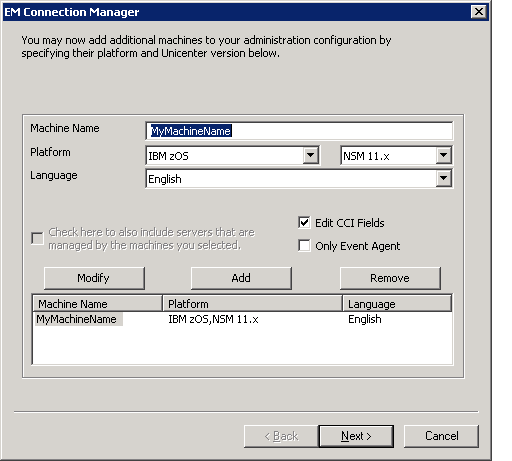
    To check for the correct Port #, the CCISSLGW started task JOBLOG can be inspected on the z/OS system. The Alias field should remain blank since aliases are only required when the CAICCI sysid is longer than 8 characters. CAICCI sysids on z/OS cannot be greater than 8 characters.

    This is the screen to edit the CCI fields in the EM Connection Manager.

  4. Click Next to display the final screen.
  5. Click Finish and wait for the successful update message box.

    This is the confirmation screen to finish updating your desktop configuration in the EM Connection Manager.