

|
|
|
Create a custom object in Studio to define the attributes or fields that make up your configured version of CA Clarity PPM pages.
The product provides default objects that are available for you to use. Use the default objects with no changes, or create custom objects and subobjects to create and manage information for your specific business needs.
Example: Project Retrospective Summary Report
In this example, project managers at Forward, Inc. provide a retrospective summary report to upper management at the end of a product release cycle. To gather project information for this report, the project managers use a retrospective form that the project participants complete. To help the project managers create and manage the retrospectives in the product, the system administrator sets up the following framework in Studio:
The following diagram describes how a system administrator creates a custom object:
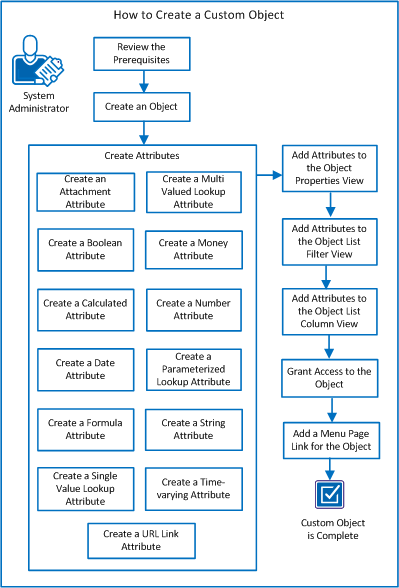
Perform these steps to create a custom object:
| Copyright © 2012 CA. All rights reserved. | Tell Technical Publications how we can improve this information |
