

|
|
|
The following procedure demonstrates the creation of a generic File Server Replication scenario. For more detailed instructions involving scenarios tailored to specific applications such as Exchange or SQL Servers, see the appropriate CA ARCserve RHA Operation Guide.
Follow these steps:
The Welcome screen of the Scenario Creation Wizard is displayed.
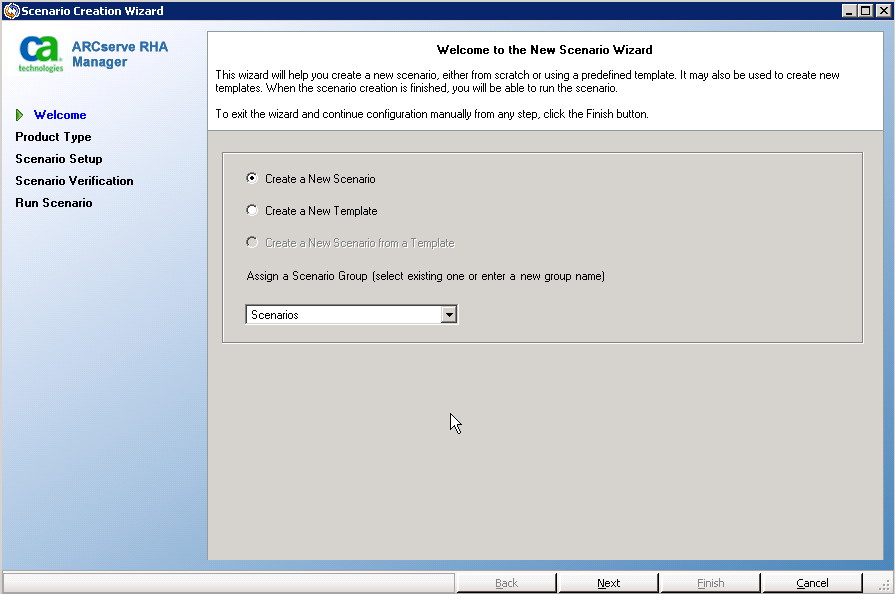
The Welcome screen enables you to create a scenario, and to assign the new scenario to a scenario group. From the Welcome screen, you can create a scenario directly or from a template, or create a template. For more information about creating templates, see the topic, Using Templates.
Note: To access other Manager features while you are creating a scenario, minimize the Scenario Creation Wizard. The Scenario Creation Wizard is bound to the Scenario View. If you switch views, the wizard is automatically minimized.
The Select Server and Product Type screen opens.
This screen lists the supported applications and product types available, depending on how you have licensed CA ARCserve RHA.
Indicates that you want to create this scenario without integrated CA ARCserve products. Click Next.
Indicates that this scenario uses CA ARCserve Backup to back up the RHA replica.
Enter the backup server name. Click Next.
Note: For more information about backups, see the CA ARCserve Backup Administration Guide on the CA ARCserve Backup bookshelf.
Indicates that this scenario is replicating a CA ARCserve D2D backup.
Enter the CA ARCserve D2D hostname or IP address. Click Next.
The ARCserve D2D dialog opens. Enter the ARCserve D2D configuration and user credentials. Click Next.
Note: For more information about D2D backups, see the CA ARCserve D2D User Guide on the CA ARCserve D2D bookshelf.
The Master and Replica Hosts screen opens.
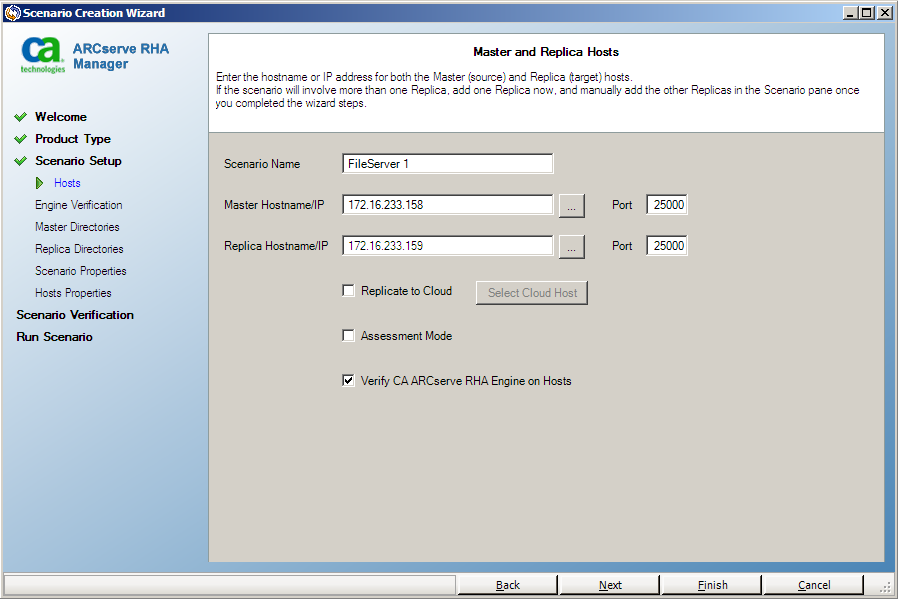
On this screen, specify the host to protect (Master) and the host that holds the replicated data (Replica).
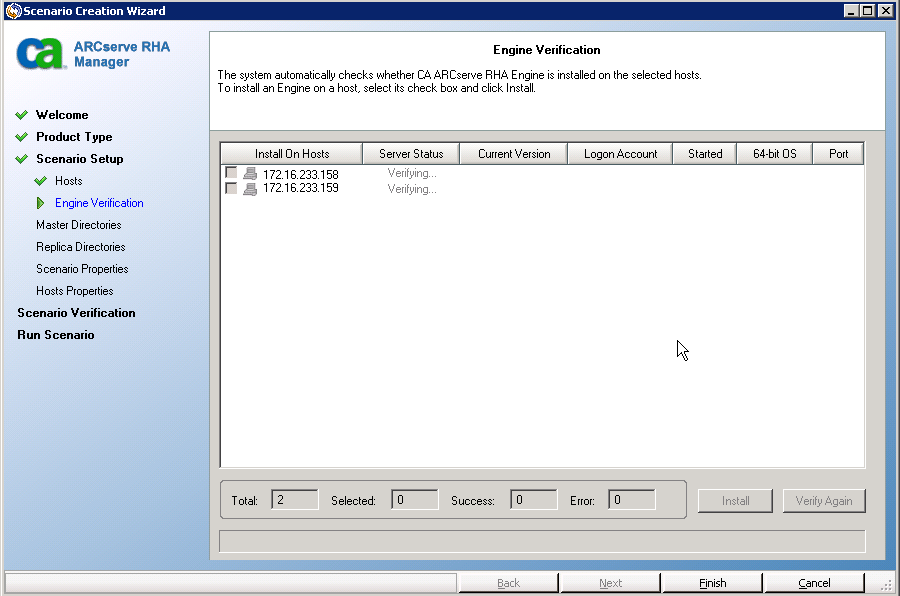
The Hosts Verification screen opens if you enabled the option, Verify the CA ARCserve RHA Engine on Hosts. The software verifies the existence and connectivity of the Master and Replica hosts specified on the previous screen. After connections are verified, the software checks whether an Engine is installed on each host. If you log in to the Manager with different user credentials than remote hosts, the Server Status is reported as Not Connected. You are then prompted to enter User Credentials for each selected host. Verification repeats after you do so.
Do one of the following:
After you click Install, you are prompted to enter the CA ARCserve RHA Engine service account credentials:
The Master Root Directories screen opens.
This screen displays the directories and files on the Master server. These directories and files are the data that can be replicated and protected. The software automatically aggregates data with a common path into one directory.
When you select root directories for the Master and Replica, the character length of the root directory and subdirectory names cannot not exceed 1024 bytes.
When you select a drive or directory on the left, the software displays its contents on the right. For more information, see Filter Master Directory Files.
Note: If you selected ARCserve D2D as the integration option on the Select Server and Product Type screen, then the backup folder is automatically selected. This folder is the backup folder specified by CA ARCserve D2D.
Replication of mount points succeeds only if those files were added to the Master before the Engine began to run. If you included the mount points in the Master root directories when the Engine was running, no error is reported but replication does not start. In this case, restart the Engine to initiate replication.
Accept the default or type a new directory name.
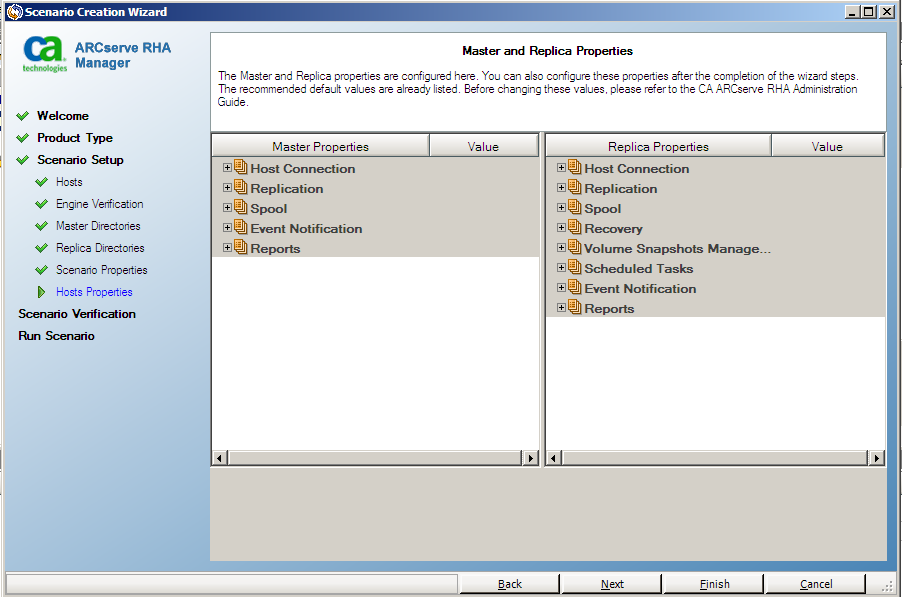
Review Spool Information before you change any Spool properties.
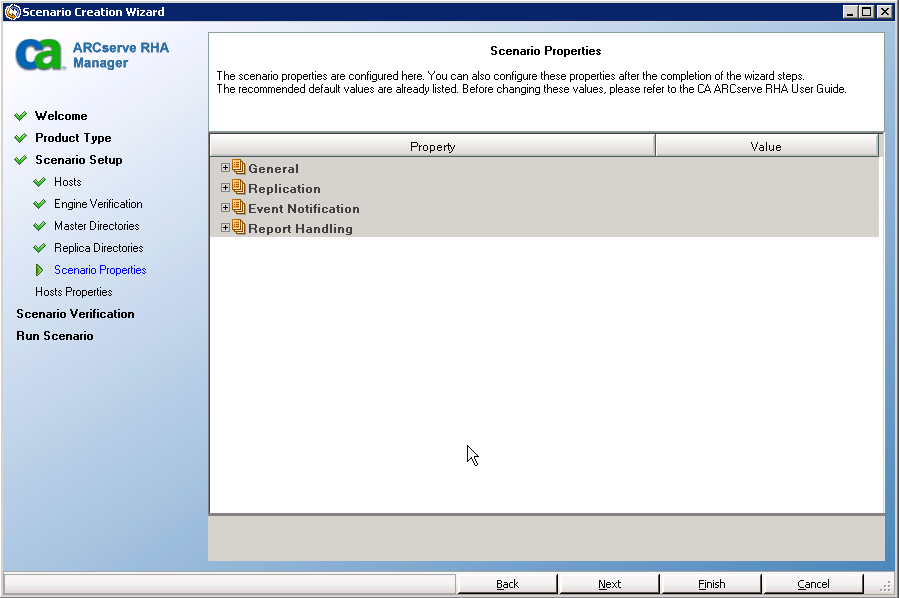
Click Next. Wait until the Scenario Verification screen opens.
Click Next when all errors and warnings are resolved. The Scenario Run screen opens.
Note: Synchronization takes a while, depending upon your data size and network bandwidth. Select Offline Synchronization if necessary. For more information, see the topic, Synchronization Methods.
If you select Run Now, the software notifies you when synchronization completes. Now the real-time replication is operational and the replication scenario is active.
A synchronization report is generated. To view the report, see the topic, Viewing a Report.
| Copyright © 2012 CA. All rights reserved. | Tell Technical Publications how we can improve this information |